Create a project
Data analyses are project-specific on the Seven Bridges Platform. Before you can start your analysis, you need to create a project.
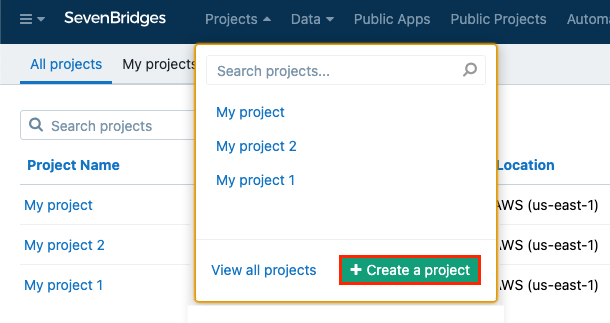
- Click Projects in the top navigation bar and select Create a project.
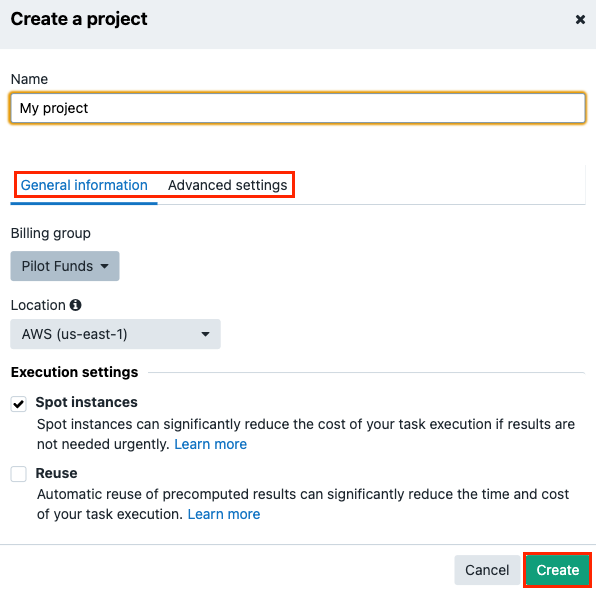
- Name your project.
Project URL
Your project will be assigned a short name based on the name that you give it. While you may re-name your project from the project Settings, you cannot change the short name after your project is created.
The short name is used as an ID to refer to the project when you access the Platform via the API. It also appears in the URL for the project when you access the Platform via the visual interface.
- Set general information:
- Set the billing group (note: for Enterprise users, the billing group is set per Division by the Division administrator).
- Select the project location. The default location is AWS region us-east-1.
- (Optional) Change your spot instance preference. The default setting is On.
- (Optional) Enable Reuse (Memoization).
- Manage advanced settings
- Network access - see Manage Network Access Control
- File download restriction - see Set file download restriction
Change the Project URL
Note that before you click Create, you can edit your project's URL and, by association, its short name.
- Click Create to finish creating the project.
Updated 8 months ago