Graph Germline Variant Detection Workflow tutorial
Start using Seven Bridges' GRAF Germline Variant Detection Workflow.
This tutorial walks you through using the Seven Bridges GRAF Germline Variant Detection Workflow to generate alignment and variant information for the NA12878 reference cell line using raw paired-end Illumina sequencing data.
Prerequisites
Everything you need to carry out this tutorial is available on the Seven Bridges Platform. Before you start, make sure you have:
NoteGRAF Germline Variant Detection Workflow is only available through the Platform running on the AWS cloud infrastructure.
Outline
As with any analysis on the Platform, the steps of running GRAF Germline Variant Detection Workflow involve setting up your project, running your task, and getting your results:

Set up your project
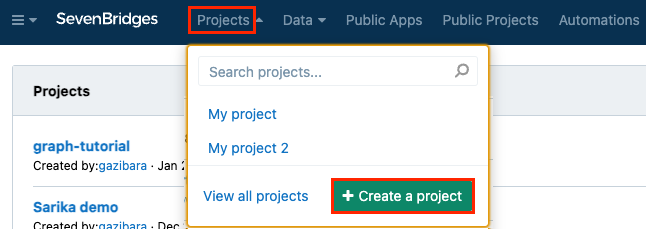
Create a new project
-
From your Seven Bridges Platform Dashboard, create a new project called "graph-tutorial". Select Projects from the top navigation, and click Create a project.
-
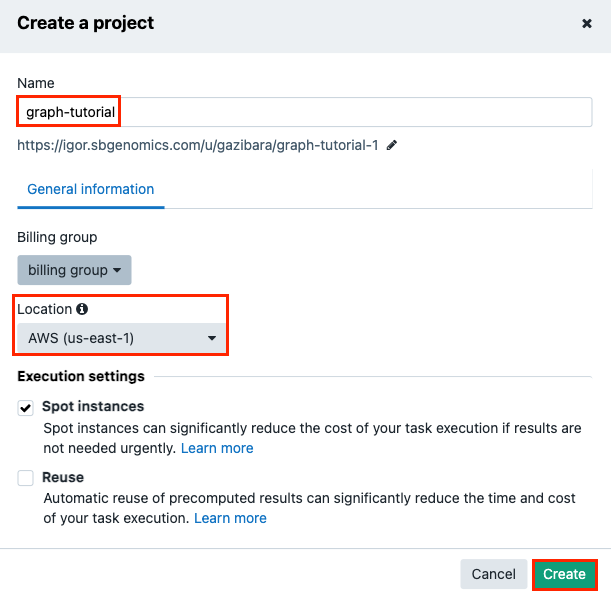
Name your project "graph-tutorial" in the popup that comes up.
-
Make sure you choose AWS as your project location (GRAF Germline Variant Detection Workflow is only available on AWS cloud Infrastructure).
-
Click Create to finish. This takes you to the project dashboard. All information related to this project is organised into tabs containing files, apps (tools and workflows), tasks (app executions), and project members.
Add files to your project
-
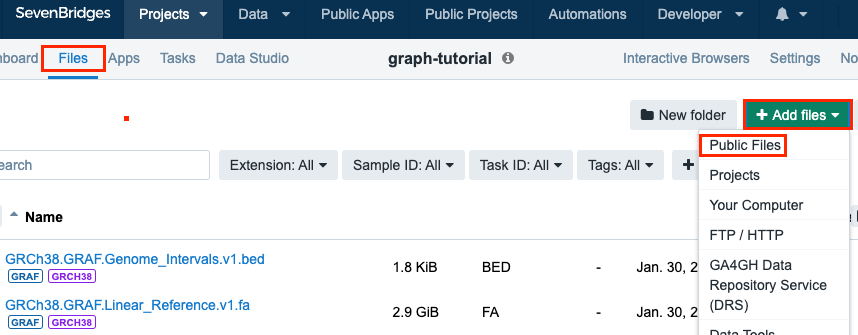
Navigate to the Files tab within the project you just created.
-
Click +Add files > Public Files.
-
Type "NA12878" into the search box.
-
Select "NA12878-Garvan-Vial1_R1.fastq.gz" and "NA12878-Garvan-Vial1_R2.fastq.gz". They should be the top two results.
-
Click Copy to Project. You don't need to add any tags for the files, just click OK to finish.
-
Close the Add Files window. This takes you to the Files tab in your "graph-tutorial" project, which now contains the two files you've just added.
Note that the FASTQ files used in this tutorial already contain the metadata required to run GRAF Germline Variant Detection Workflow.
Next, you will need to add the reference files required for the graph-based alignment and variant calling. In the same menu you just used to add the NA12878 sample (Public files), search for and add the following files to your project:
- GRCh38.GRAF.Pan_Genome_Reference.v1.vcf.gz: The pan-genome graph reference, containing genetic information of human populations around the world.
- GRCh38.GRAF.Linear_Reference.v1.fa: The linear reference file used as the backbone for the pan-genome graph.
- GRCh38.GRAF.Genome_Intervals.v1.bed: The regions where variant calling will be performed.
Run GRAF Germline Variant Detection Workflow
Add Graph WGS to your project and create a draft task
-
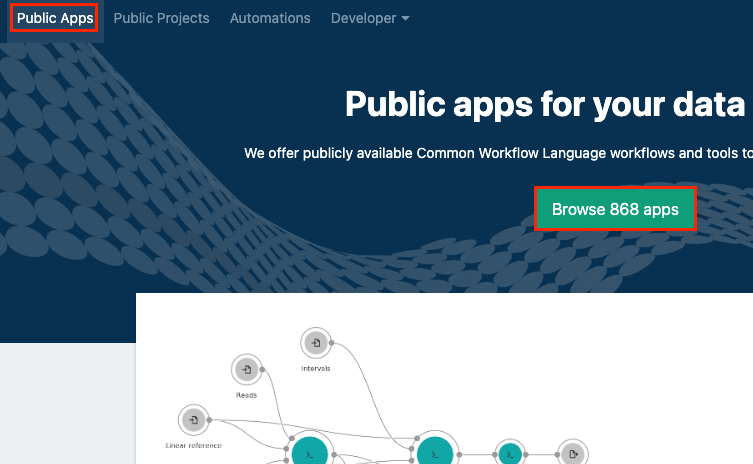
ClickPublic Apps in the main navigation.
-
Click Browse Apps.
-
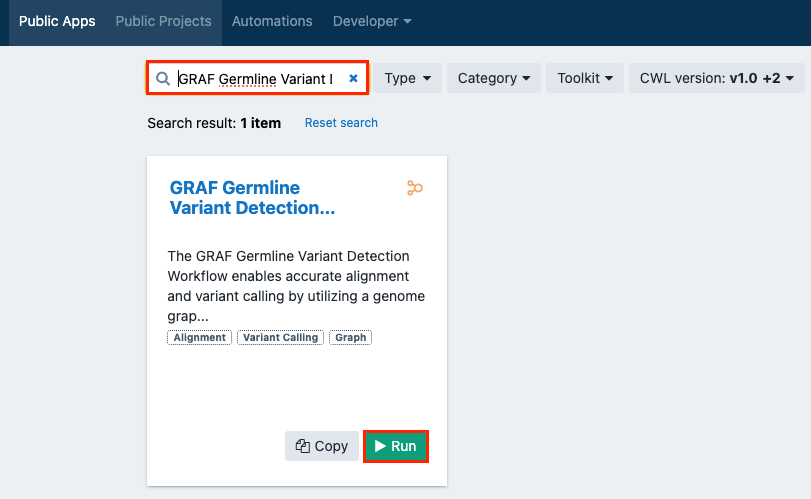
Type "GRAF Germline Variant Detection Workflow" into the search box.
-
Click Run on the app card for "GRAF Germline Variant Detection Workflow".
-
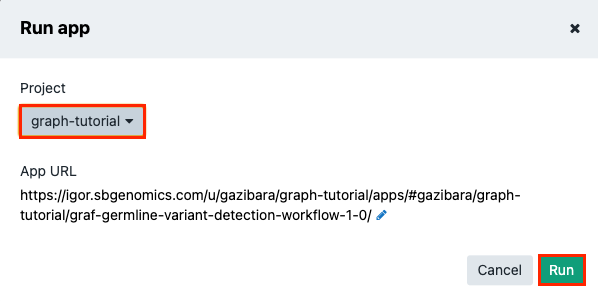
Choose your previously created "graph-tutorial" and click Run. This takes you to the draft task page, as emphasized by the DRAFT label next to the title.
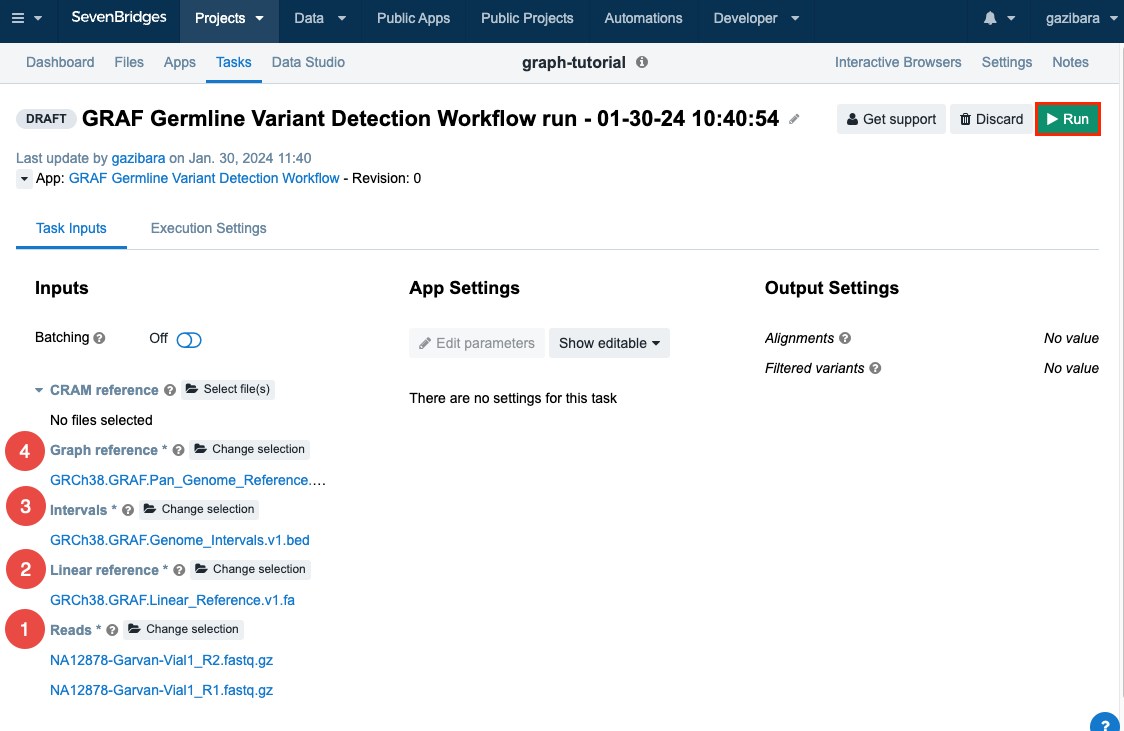
The app, "GRAF Germline Variant Detection Workflow", has also been copied to your project. The draft task page is where you set up your analysis. Initially you will see some red input data parameter errors because you haven't set the inputs yet. We will do that next.
Set your inputs
To start setting up the input files:
-
Click Select file(s) near the "Reads" input, select the FASTQ files you added earlier ("NA12878-Garvan-Vial1_R1.fastq.gz" and "NA12878-Garvan-Vial1_R2.fastq.gz"), and click Save selection to add the files to your draft task.
-
Click Select file(s) near the "Linear Reference input", select the FASTA file you added earlier (“GRCh38.GRAF.Linear_Reference.v1.fa”), and click Save selection.
-
Click Select file(s) near the "Intervals" input, select the BED file you added earlier (“GRCh38.GRAF.Genome_Intervals.v1.bed”), and click Save selection.
-
And finally, click Select file(s) near the Graph reference input, select the VCF.GZ file you added earlier (“GRCh38.GRAF.Pan_Genome_Reference.v1.vcf.gz”), and click Save selection.
Run your task
Click Run. It should take around 4 hours for the task to complete.
Get your results
You can follow the progress of your task on the Tasks tab and you will also receive an e-mail notification when the task is finished.
Clicking the task name will take you to the task page detailing the inputs, the app settings and the outputs the task has produced. Your results can be found under Outputs:
- Alignments: contains read alignment information
- Filtered variants: contains all the variants detected by GRAF Germline Varint Detection Workflow
View the alignment in the Genome Browser
- Click on your output BAM file on the completed task page
- Scroll to the bottom of the resulting page to see the alignment in the Genome Browser
Use outputs in other projects on the Seven Bridges Platform
- Go to the Files tab on your project dashboard.
- Select your output files.
- Click Copy to and then the name of the project you want to use the files in from the dropdown menu
- Click OK in the popup to start copying the files
We're here to help you use GRAF Germline Variant Detection Workflow on the Seven Bridges Platform.
If you can't find what you are looking for in the documentation, please get in touch with us at [email protected].
Updated 9 months ago