Import from a DRS server
Overview
Seven Bridges Platform/BMS allows you to import and use DRS files from either external sources or Cancer Genomics Cloud powered by Seven Bridges (CGC) environment.
After importing the files, you can then use them as any other file on the Platform. Please note that the actual files physically remain hosted on the source platform and are only linked from Seven Bridges Platform.
Access the import feature
- Open the project to which you're importing files.
- Select the Files tab and then click + Add Files.
- Click Add Files and choose GA4GH Data Repository Service (DRS), as shown below.
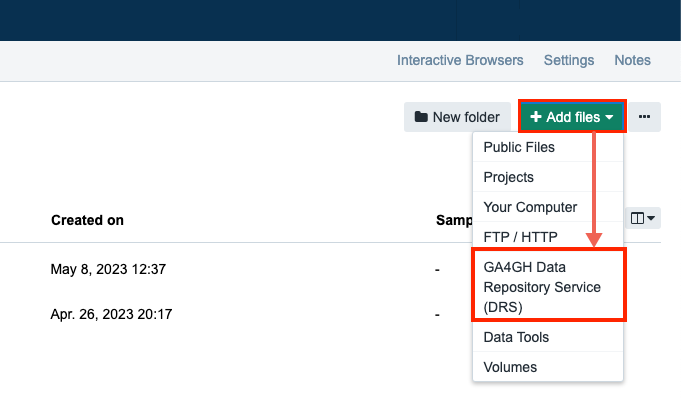
The page for importing files is displayed. The following two options are available:
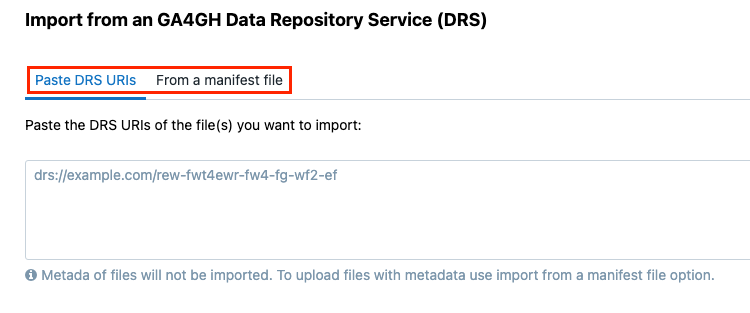
- Paste DRS URIs - use this option to paste the list of DRS URIs of the files you want to import (see below).
- From a manifest file - use this option to import files by using a manifest (see below).
Import files by pasting DRS URIs
- Enter DRS URIs into the text area.
Important notesThe maximum number of links you can put inside the text area is 500. To import again, you will have to wait for 5 minutes.
In addition, please bear in mind that all other API calls you make within this time frame will also count toward this limit. URLs should be entered one per row.
- (Optional): Enter tags in the Tag files box (see below).
- Resolve naming conflicts - choose the method for resolving a naming conflict; read more below.
- Give your consent regarding importing sensitive data by checking the related option.
- Click Import to start the upload.
Import from a manifest file
To import files from a manifest file:
- Access your project.
- Click the Files tab.
- Click Add files and choose option "GA4GH Data Repository Service (DRS)".

- Click Browse manifest and choose the manifest file from your computer.
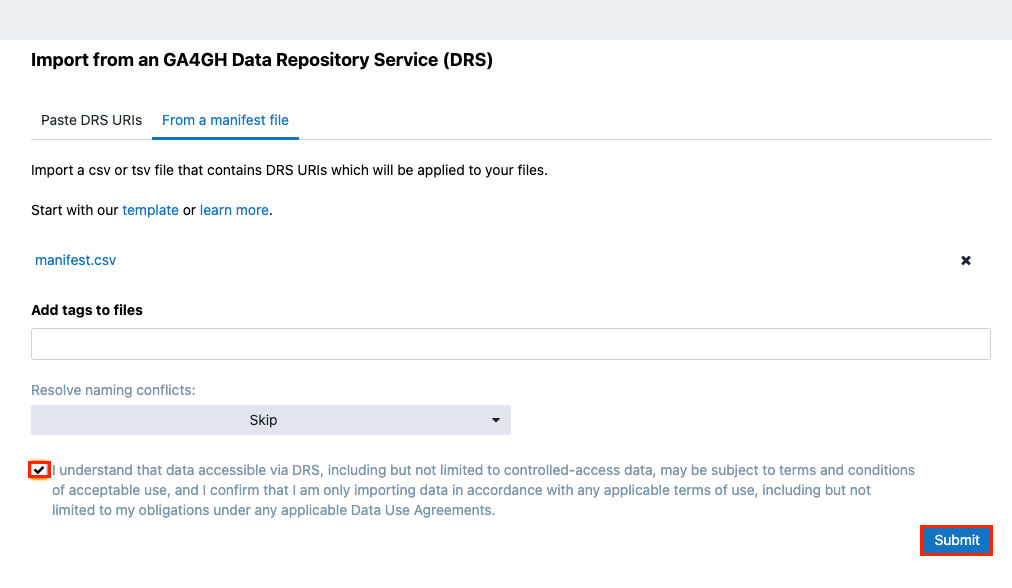
- (Optional) Tag your files (see below).
- Choose the method for resolving naming conflicts (see below).
- Give your consent regarding importing sensitive data by checking the related option.
- Click Submit.
The files are imported to your project.
Manifest file format
The following rules apply for creating the manifest file.
| Field | Description |
|---|---|
drs_urimandatory | The DRS uri of the file you are importing. |
namemandatory | The name of the file. |
| subsequent fields | All other fields in the manifest file are treated as metadata. |
Add tags to files
To make it easier to visually identify and organize files you can tag them before the import. Separate tags with commas or press enter.
All tags which are already in the selected project are autosuggested in the drop-down menu. Learn more about tagging your files.
Resolve naming conflicts
Naming conflicts happen when you try to import an item (file or folder) from a DRS server to a project's root folder or subfolder, where an item with the same name already exists. The list below illustrates the possible cases of naming conflicts and the way they are resolved depending on which option is selected in the Resolve naming conflicts dropdown:
- Importing a file that has the same name as an existing file at the destination path:
- Skip (default): The file won't be imported. This is the default behavior.
- Auto-rename: The imported file will be automatically renamed by adding a prefix (underscore and serial number).
- Overwrite: The existing file will be overwritten by the file imported from the server.
- Importing a file that has the same name as an existing folder at the destination path:
- Skip (default): The file won't be imported.
- Auto-rename: The imported file will be automatically renamed by adding a prefix (underscore and serial number).
- Overwrite: The file won't be imported.
The following table illustrates the entire naming conflict resolution mechanism:

Check import status
To check the progress of your import, click the notification bell in the upper right corner.
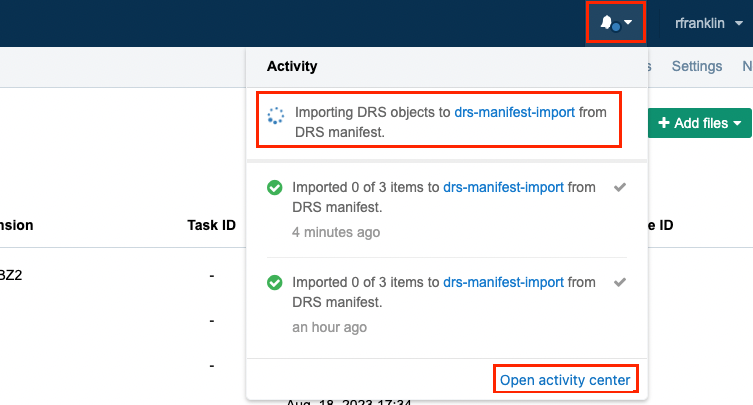
Click Open activity center to see more detailed information about each of the imports.
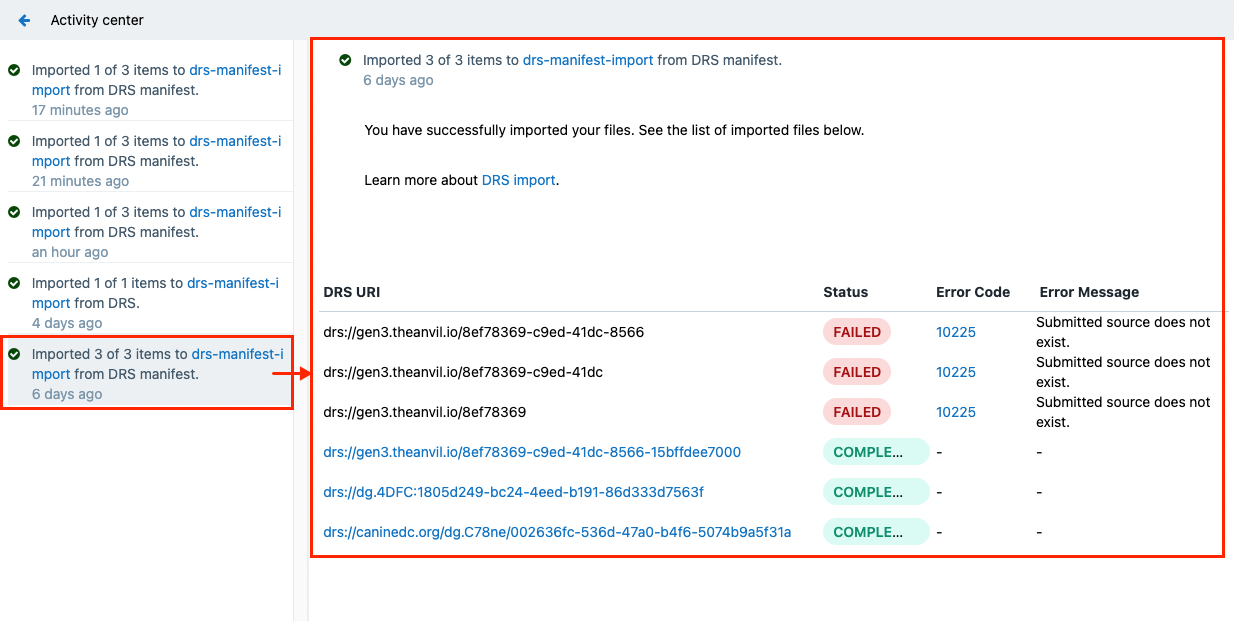
Click on an import in the left pane, and the right pane will show detailed information about that import including:
- DRS URI - the URI the file was imported from
- Status - the status of the import for each of the files; in case of a failed import, the following information will also be available:
- Error Code - click to see detailed information about the error code
- Error Message - the description of the error
Updated 9 months ago