Nextflow Quickstart Tutorial
Objective
The goal of this tutorial is to show you the entire procedure of bringing a Nextflow application to the Seven Bridges Platform and running the application at scale using test data that is already available on the Platform. We will be using the nf-code/rnaseq pipeline from the nf-core GitHub repository of curated pipelines built using Nextflow.
Prerequisites
An account on the Seven Bridges Platform.
Procedure
The procedure of uploading and running a Nextflow app consists of the following steps:
- Download the rnaseq pipeline from the nf-core GitHub repository.
- Create a project on the Platform.
- Upload the app to the Platform.
- Verify that the app is visible and can be run on the Platform.
Download the rnaseq pipeline
This step takes place in your browser.
We will be using the nf-code/rnaseq pipeline to demonstrate how it is prepared, customized and pushed to the Platform for execution. To download the app:
- Navigate to https://github.com/nf-core/rnaseq in your browser.
- Click the Code dropdown and select "Download ZIP". An archive containing the Nextflow pipeline is downloaded to your local machine.
- Navigate to your local download location and unzip the downloaded package into a folder named rnaseq-master. The folder contains the entire set of app-related files, the most important ones being:
main.nfnextflow.confignextflow_schema.json
Create a project on the Platform
This step takes place on the Platform.
For this tutorial, create a dedicated project named Nextflow Project on the Platform by following the steps below:
- Log in to the Platform.
- Click Projects in the top navigation bar and select "Create a project".
- Name your project "Nextflow Project".
- Keep the default values for all other project settings.
- Click Create. Your new project is now created.
Upload the app to the Platform
To add the rnaseq app to the Platform through the visual interface, follow the steps below:
-
Navigate to Nextflow Project on the Platform.
-
Open the Apps tab.
-
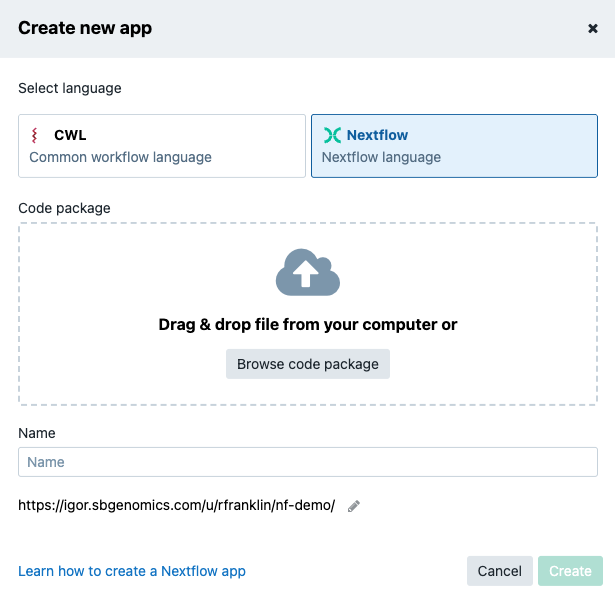
Click Create app. This opens the new app creation dialog.
-
Under Select language, click Nextflow. The code package upload field is displayed.

-
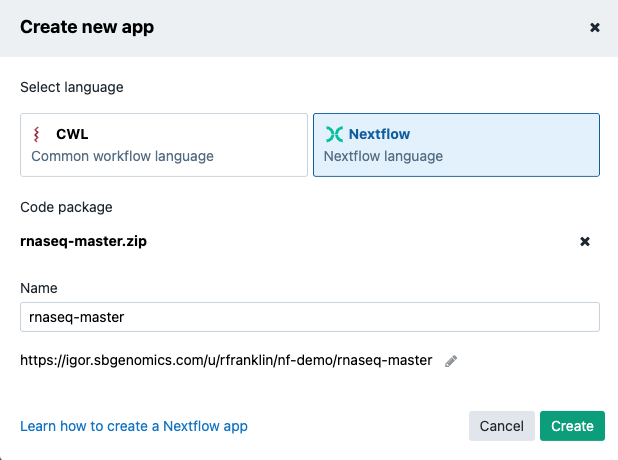
Browse or drag and drop the code package. The Name field is automatically populated based on your code package name.

-
Click Create. This starts the process of uploading and adding the app to the Platform. For the process to complete successfully, keep the window open until upload is completed.
Once everything is completed, you are taken to your app details. To test your app, click Run in the top-right corner. This creates a draft task where you can set your app inputs and run it.
This concludes the Nextflow Quickstart Tutorial. After successfully completing it, you should be able to create a Nextflow app for use on the Platform.
To make changes to the UI representation of the Nextflow applications on the platform, as well as modify inputs, outputs, application settings and more, visit the [Add nextflow Apps Through the Command Line](https://docs.sevenbridges.com/docs/add-nextflow-apps-through-the-command-line-interface-cli) page.
Updated 3 months ago
