Publish a third-party app or workflow
This tutorial will walk you through publishing your own app or workflow on the Seven Bridges Public Apps Gallery.
Objective
On this page, we’ll start the process of publishing a tool or workflow on the Seven Bridges Platform. We encourage you to consult the tutorial for building a workflow.
Prerequisites
To begin this procedure, you’ll need to have already built and tested your tool or workflow. The process of making the tools or workflow publicly available will be explained in this tutorial. If you are new to the tool and workflow editor, you might want to read the workflow editor basics before starting to create your first workflow.
Procedure
First, we'll create a project to house our tool or workflow. Then, we’ll move our tools or workflows to that project. Lastly, write a complete description of the tool or workflow that follows our guidelines and provides other users with context for using the tool or workflow.
Create a "Commit" project
- Click Projects in the top navigation bar and select “Create a new project”.
- Name the project “Commit: [ Tool / Workflow name ] or in some circumstances when publishing many tools and workflows, “Commit: [ Lab Name]”.
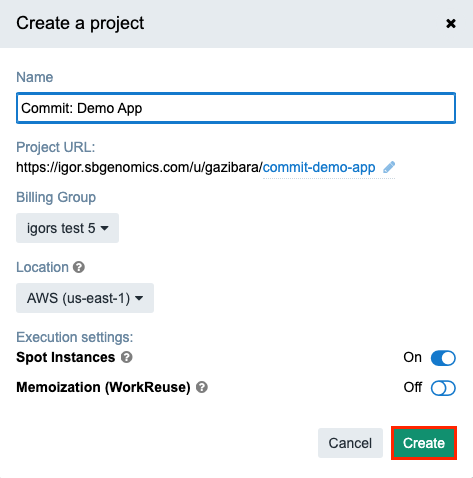
The project dashboard is displayed. The next step is to create the new workflow.
Add tools or workflows to your Commit project
We will now add our tools to the newly-created “Commit” project.
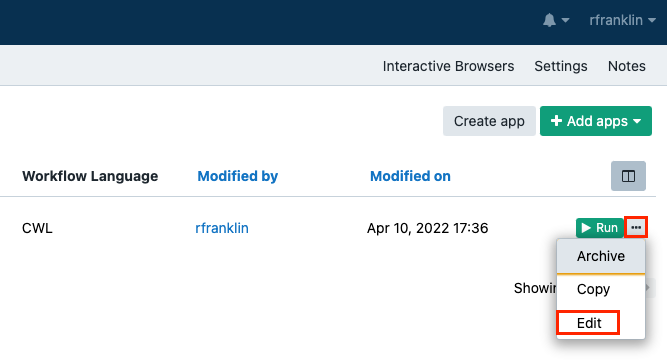
- First, navigate to your other project that contains the app or workflow you intend to publish.
- Click the Apps tab.
- Click the ellipsis menu the top right corner and choose and choose "Edit".
- On the editor page, click the Code tab.
- In the “Code” text editor, select all of the code and copy it. (Note: This can also be done by typing ctrl/command + a, then ctrl/command + c on Windows and Mac computers)
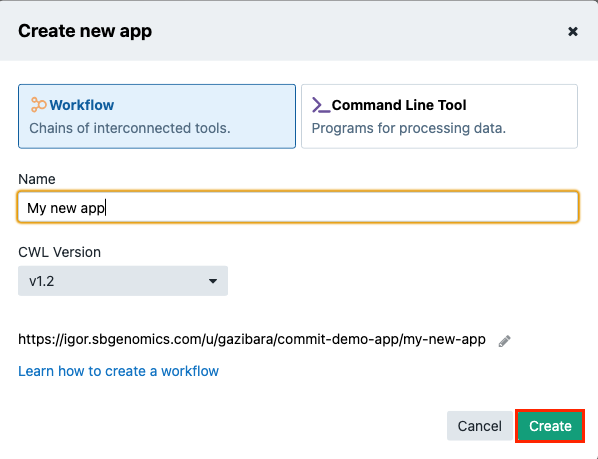
- Return to the "Commit" project and access the "Apps" section.
- Click Create app in the top right corner and select "Workflow"(for a workflow consisting of multiple apps) or "Command Line Tool" (for single apps) before naming your creation.
- Once again, navigate to the “Code” tab along the top of the page. Remove all the existing code and paste the code you had previously copied (or type ctrl/command + v).
- Save your work by clicking the save icon in the top right corner.
Add app information
Now that we’ve created a commit project containing our tools or workflows, we need to ensure a thorough description is written that will provide other users with information about the tool and instructions for using it.
From the "Apps" tab, click on the tool you want to create a description for then select “Edit” from the top right corner of the page. Navigate to the “App Info” tab to write a description for your tool.
Contact our support team to finish
Once everything is ready, contact the support team by clicking on the blue question mark located at the bottom right corner.
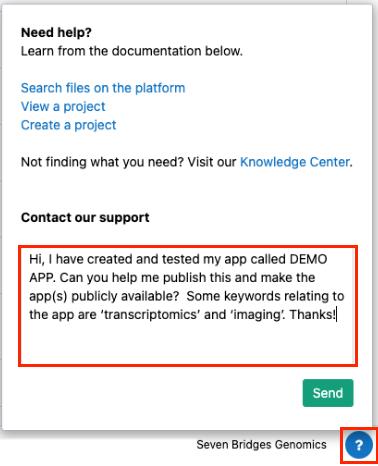
Use the following template to let the team know your app is ready for publishing:
“Hi, I have created and tested my app called <insert app name>. Can you help me
publish this and make the app(s) publicly available? Some keywords relating to
the app are <provide relevant keywords such as ‘transcriptomics’ or ‘imaging’>.
Thanks!”
And that's it! We've started the process of publishing the app!
Please note that once published, you will be responsible for maintaining the app or workflow and any in-depth troubleshooting or questions will be directed to you.
If you find yourself wanting any additional information or just want to chat, feel free to contact [email protected] and someone will reach out to you.
Updated 8 months ago