This page contains procedures related to the legacy editor. Try out our new editor that has a more streamlined design and provides a better app editing experience. More info.
Workflows are chains of connected tools. You can edit any of the publicly available workflows hosted on the Seven Bridges Platform by changing the way that the tools in them are connected, and modifying the way that they run by setting their parameters.
This can all be carried out in the Seven Bridges Platform Workflow Editor. Additionally, you can use the Seven Bridges Platform Workflow Editor to build a workflow from scratch.
Expose tool parameters for configuration
Exposing a tool parameter makes it configurable when you run the workflow. You can expose parameters of tools in a workflow using the Workflow Editor.
If you are running a tool on its own, not in a workflow, you should expose its parameters by leaving these values empty in the Tool Editor description. For details, see the Seven Bridges Platform documentation on editing a tool.
To expose parameters of a tool in a workflow:
- Open your project.
- Click the Apps tab.
- Click the ellipsis menu next to the workflow name.
- Click Edit, which will open the Tool Editor. Alternatively select Edit with Rabix Composer to edit the tool with our desktop editor - learn more.
Copying a public workflowIf the workflow you want to edit is a public workflow, you should first copy it to your project.
The Workflow Editor is shown below:
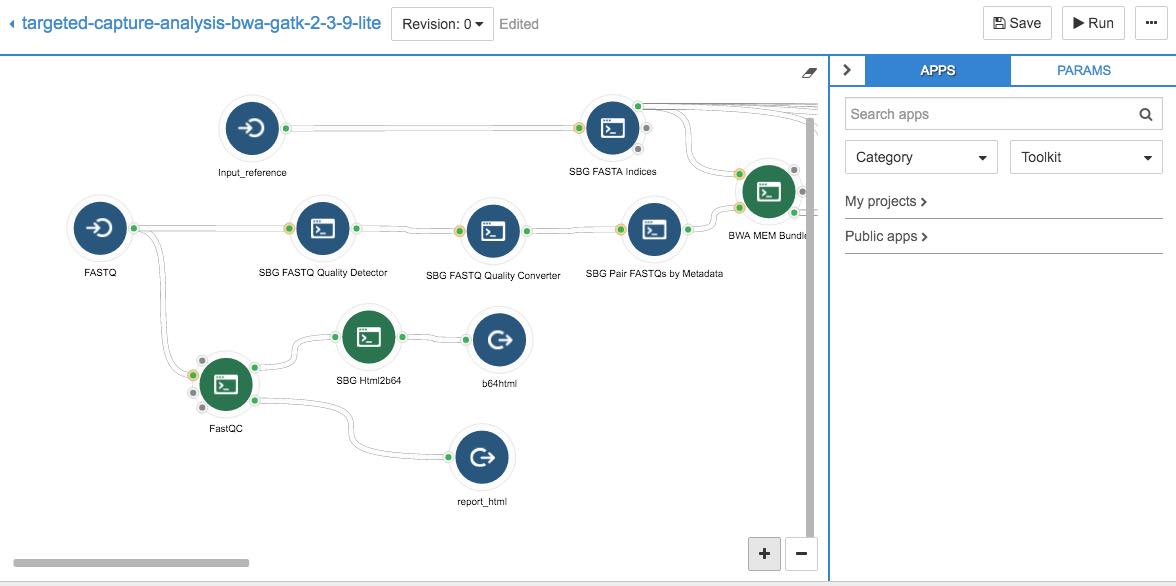
- Click on a tool whose parameters you want to be able to edit with each execution.
- Select the panel marked PARAMS on the right hand side of the Workflow Editor.
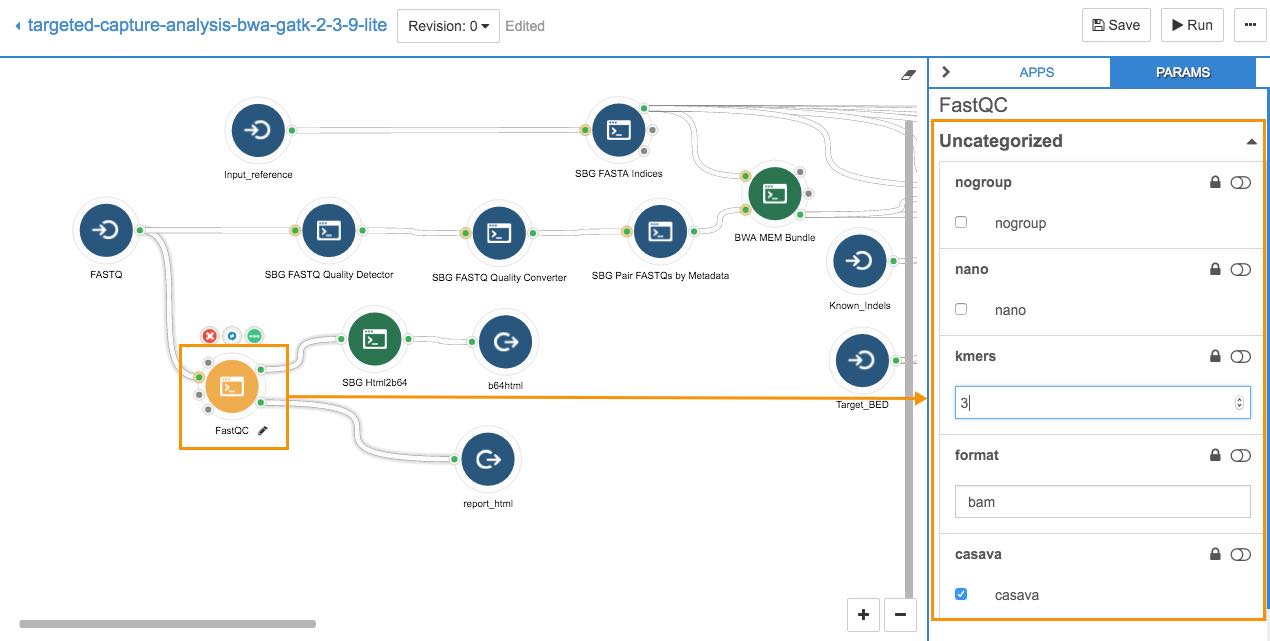
- You will see a list of parameter names, with fields next to them. In the example above, the fields are nogroup, nano, kmers, format, and cassava.
- By each parameter name is a lock icon
 . Click the lock icon to expose the parameter. This will make the parameter configurable from the Draft Task page.
 - There is also a slider next to each parameter name. Use the slider
 to add an input port for the parameter. This allows you to pipe in values for the parameter from another tool in the workflow.
 - To set the parameter value now, so that it cannot be altered at runtime, simply enter the value in the field, as shown.
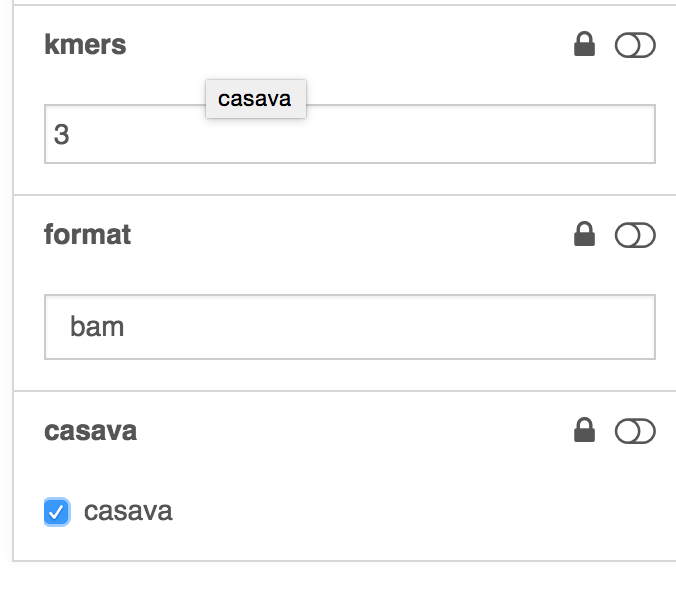
You can set the value for the parameter using a check box, drop-down list, or free form, depending on what kind of value the parameter takes (a boolean value, a string, etc).
Additional tool options
When you select a tool in a workflow, the following additional icons are displayed above the tool:
 Click this icon to remove the node from the workflow. This also removes all inputs and outputs connected to and from the tool.
 Click this icon to do the following:
INFO tab:
 See detailed tool information and description added by the tool's creator/publisher on the Platform.
INPUTS tab:
 Set the order in which tool inputs are handled
Create one job per input using scatter
 CHANGE ID tab:
Change the port's ID.
 HINTS tab:
* Set execution hints for the tool within the workflow This icon is displayed only if the tool has been updated and you are using an unedited copy of the tool in your workflow. By clicking the icon you synchronize the tool with its latest version.
Add suggested files for an input
When editing a workflow, you can set suggested files from Public projects for any of the workflow's file inputs. This will allow anyone who runs the workflow to set the suggested files as inputs in a single click, and only have to add the remaining input files manually.
To set suggested files for a workflow:
- Click an input node in the workflow editor.
- In the pane on the right, click the folder icon next to the Input suggested files field. You can now set suggested files for the input node.
- Navigate through Public projects or use the search fields to find the file(s) you want to set as suggested.
- Mark the checkboxes next to the file(s).
- Click Pick in the bottom-right corner.
Once you have saved the workflow, the selected files will be automatically suggested as inputs when the workflow is run on the Platform. Please note that suggested files can currently be defined only for sbg:draft-2 workflows.
Set the order in which tool inputs are handled
The workflow editor lets you pipe multiple incoming data streams into the same port of a tool. For instance, in the example below the app 'my-app' has one port with ID 'input_1'.
There are two input nodes that feed data into this port: 'Input_1' and 'Input_1_1':
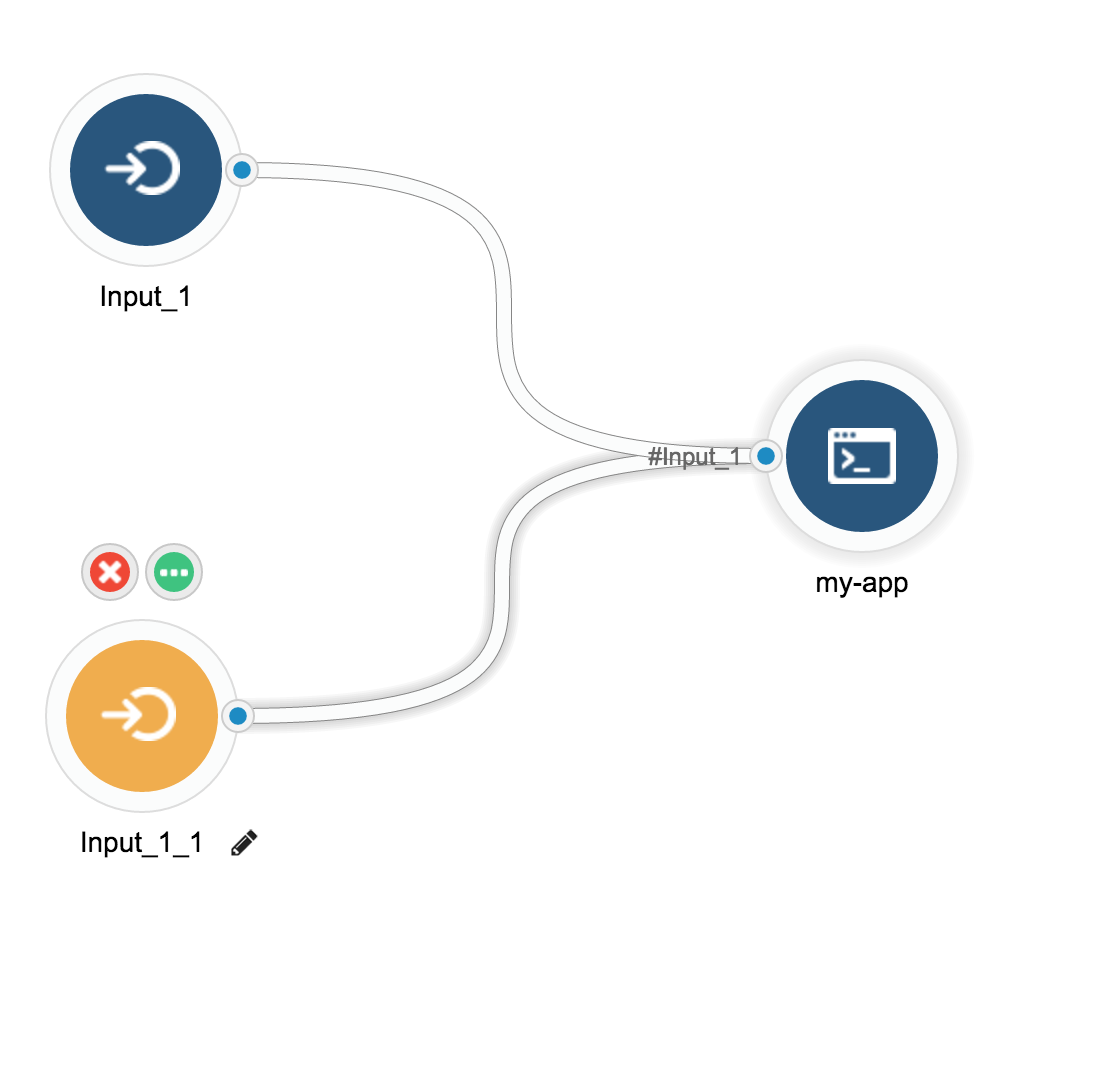
When you have multiple inputs to a single input port, the order in which the data is analyzed might be important. To set this order, click on the info icon ![]() for the node to see further information about it. Then click the tab labeled INPUTS.
for the node to see further information about it. Then click the tab labeled INPUTS.
Next to each input node's name, is an icon with three horizontal lines. Click this to drag and drop the names of the input nodes to match the order in which you want their inputs analyzed.
In the example below, inputs from input node 'Input_1' will be handled before those from 'Input_1_1'.
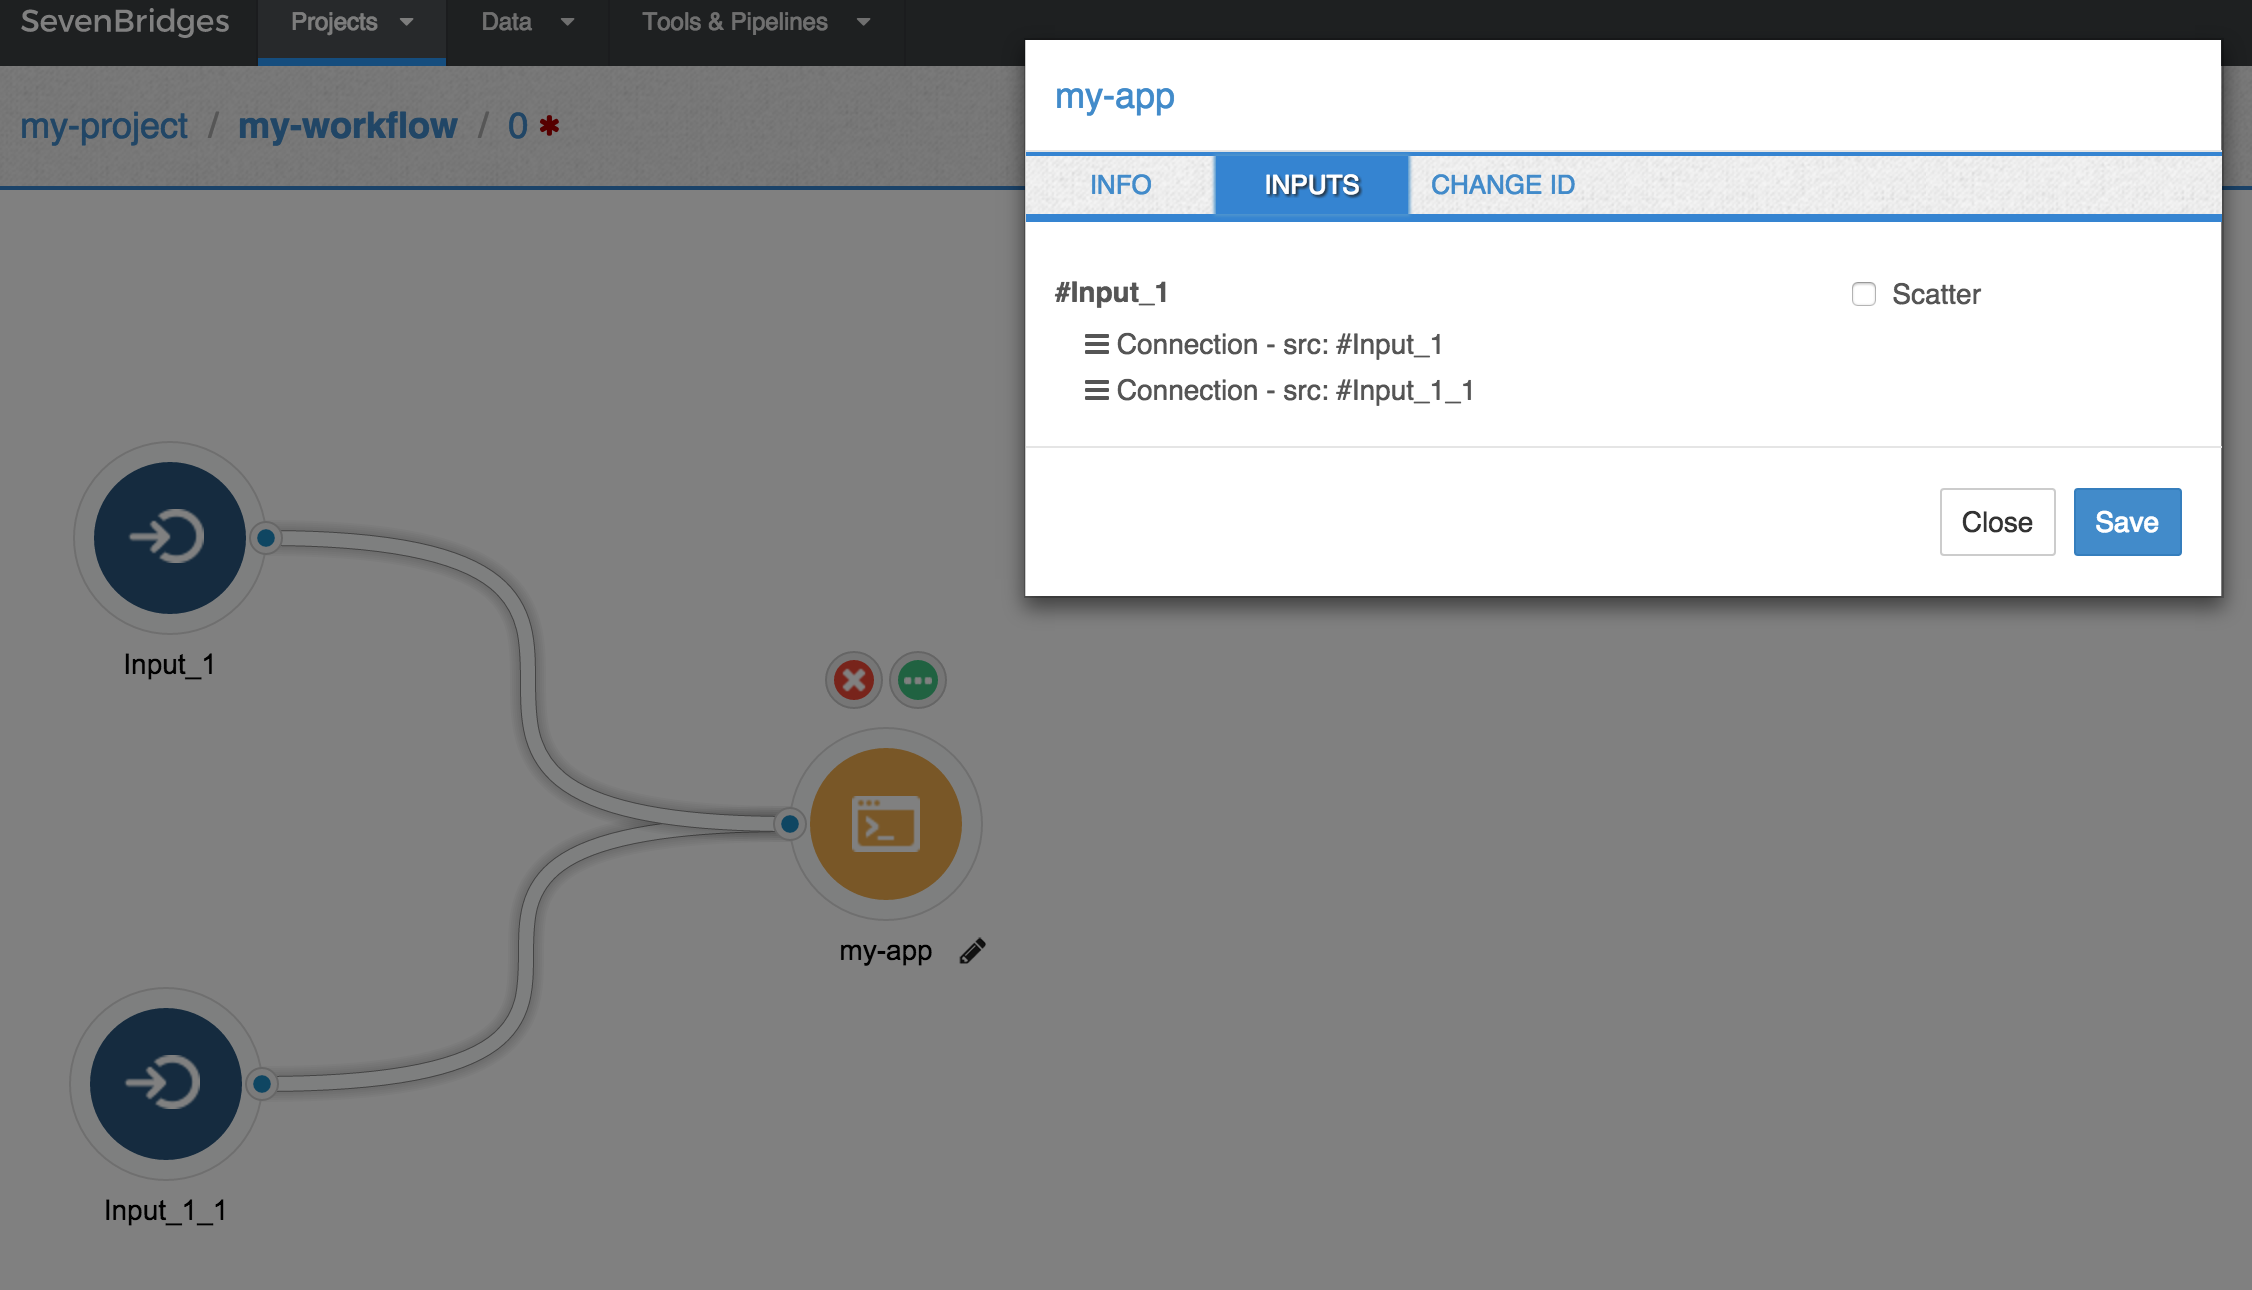
Order the inputs to a tool.
For the tool to work properly, please make sure that the schema for the tool inputs is set to "File" and not "Array".
Create one job per input using scatter
If you are inputting a list to a node, you can set the tool to iterate through the list and run one job per list element. This is known as "scattering".
Scatter is a "parallel map" or "for-each" construct, since only one input is iterated over while the rest remain fixed. It is the equivalent of "currying" the node with all other inputs, and running a parallel map over the input marked as scatter. Note that this input needs to be a list.
If you instruct a tool to scatter on an n element list, it will perform n jobs, and output an n-element array.
To instruct the tool to scatter over a list:
- Select your tool in the Workflow Editor.
- Click the info icon
 on the tool whose inputs you want to scatter. This will bring up an information box for the tool, as shown below.
 - Select the tab marked Inputs, and you will see the names of the tool's input nodes.
- Check the box marked scatter next to a node that takes in lists in order to iterate though its items.
ExampleFor example, STAR has a single reference file and a single GTF file. However, it has multiple reads files. In this case, you should scatter only on reads, as shown below. Note that you must supply a list of input files on the reads port.
This creates a job for each file in the list of input files. Each output port of STAR becomes a list assembled from the outputs of individual jobs.
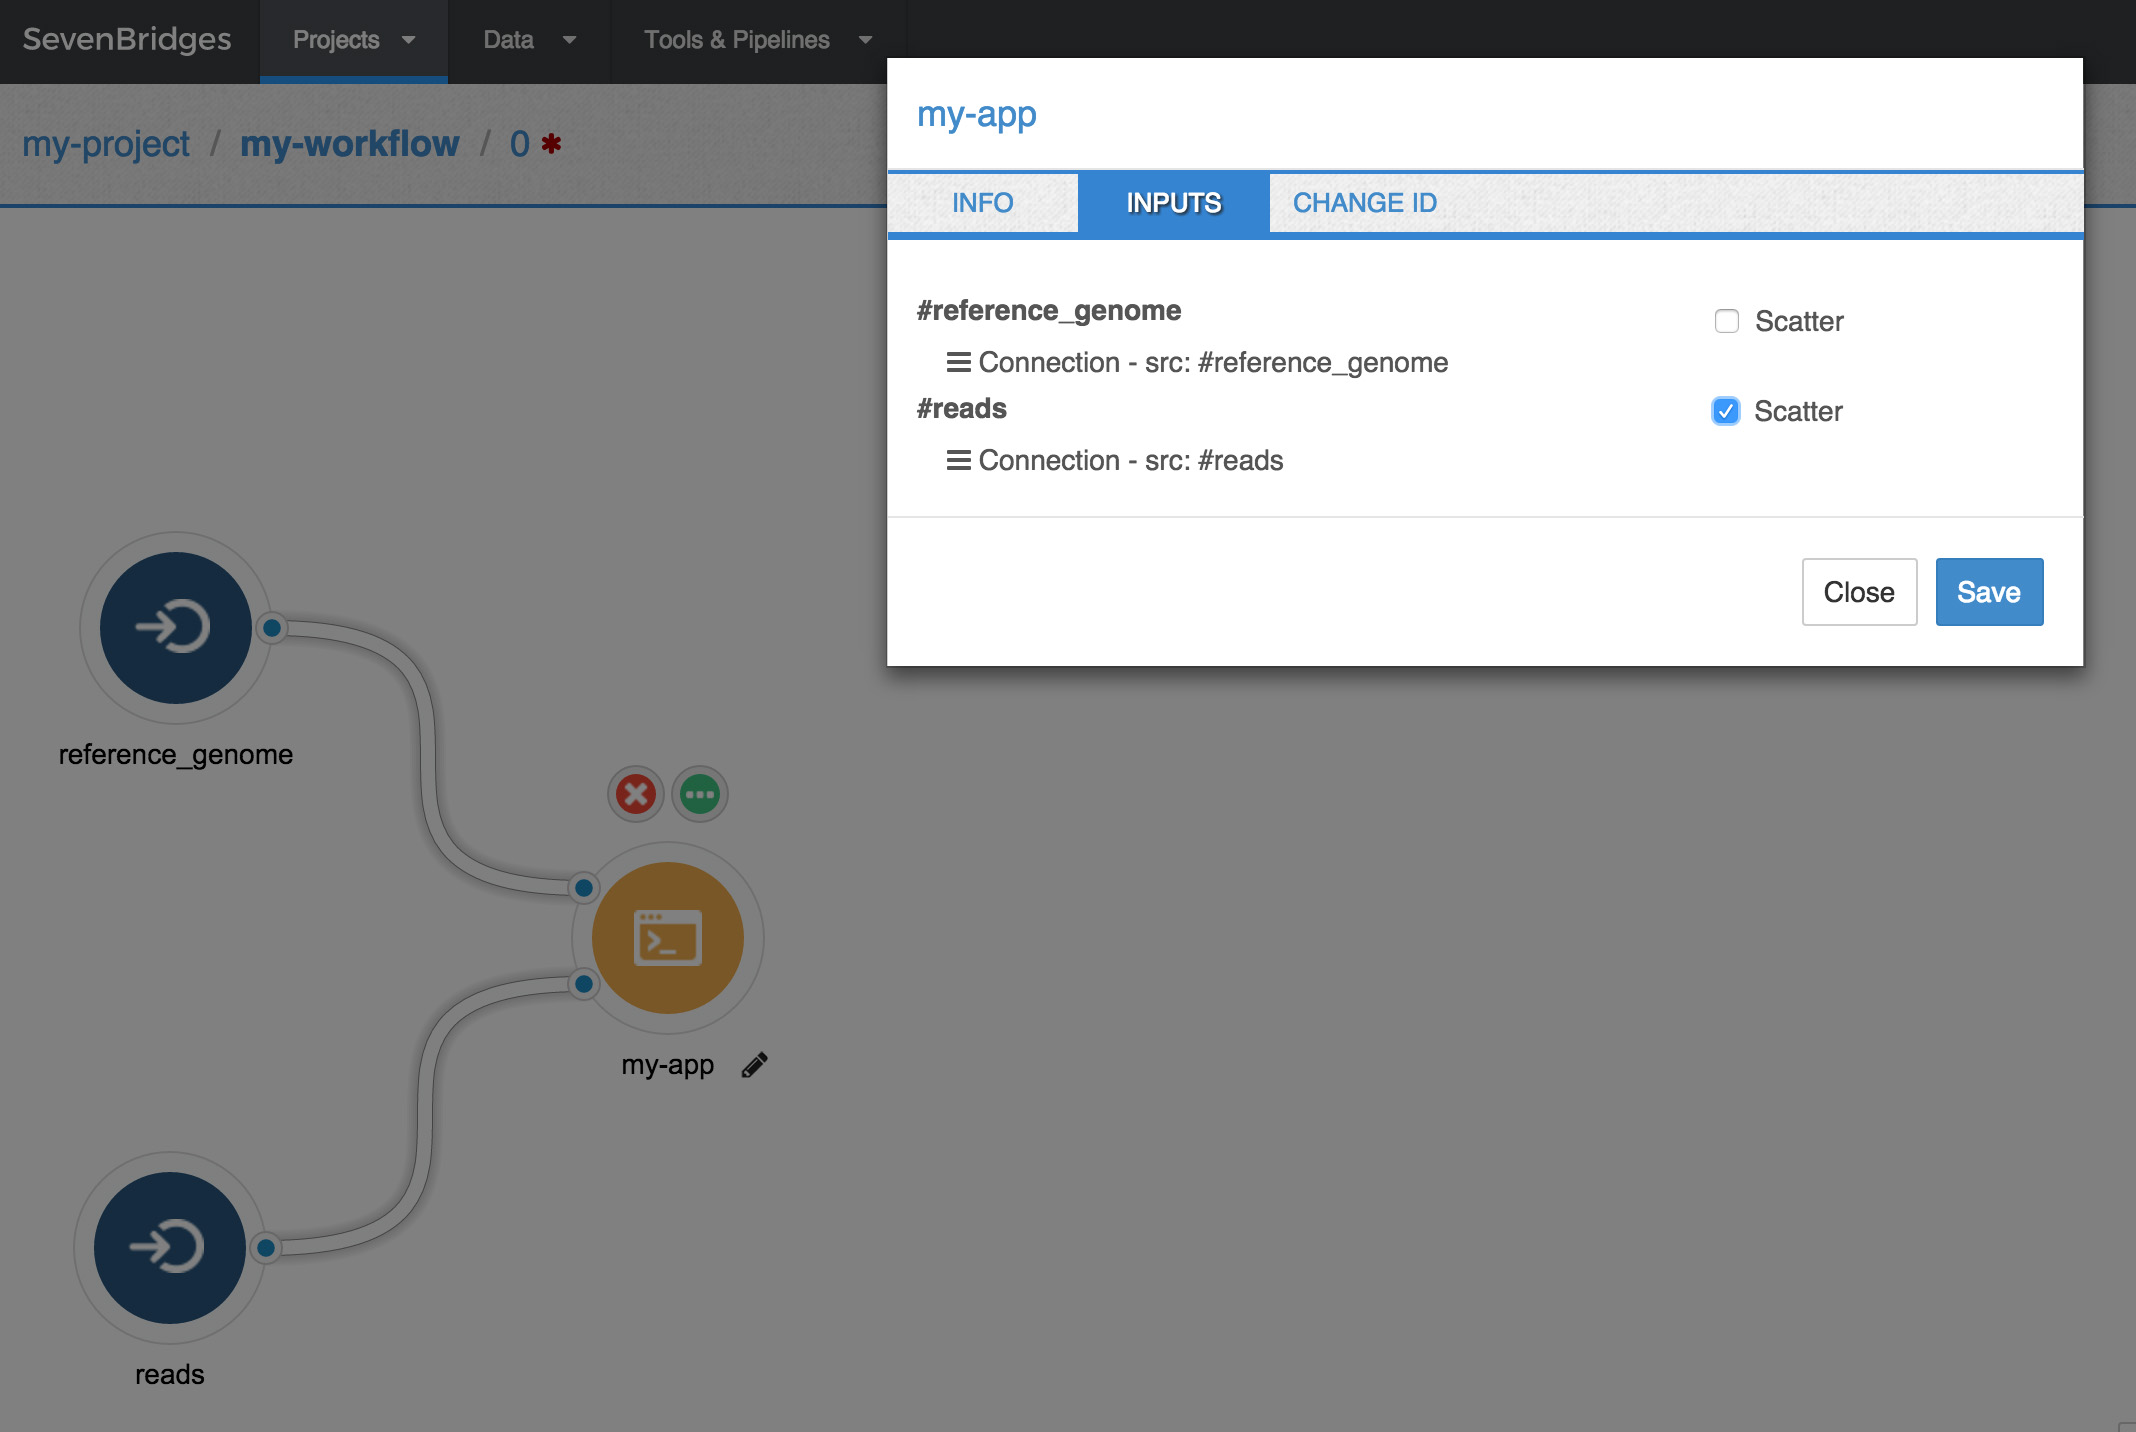
Scatter over reads.
Updated 3 months ago
