Manage teams
As an Enterprise administrator and Division administrator, you can create and manage Teams of Division members. Organizing Division members into Teams will allow you to add groups of users to projects more easily: instead of adding project members individually, you will be able to add a whole Team.
Create a Team
To create a Team:
- Click your username in the upper right corner.
- Click the name of your Division.
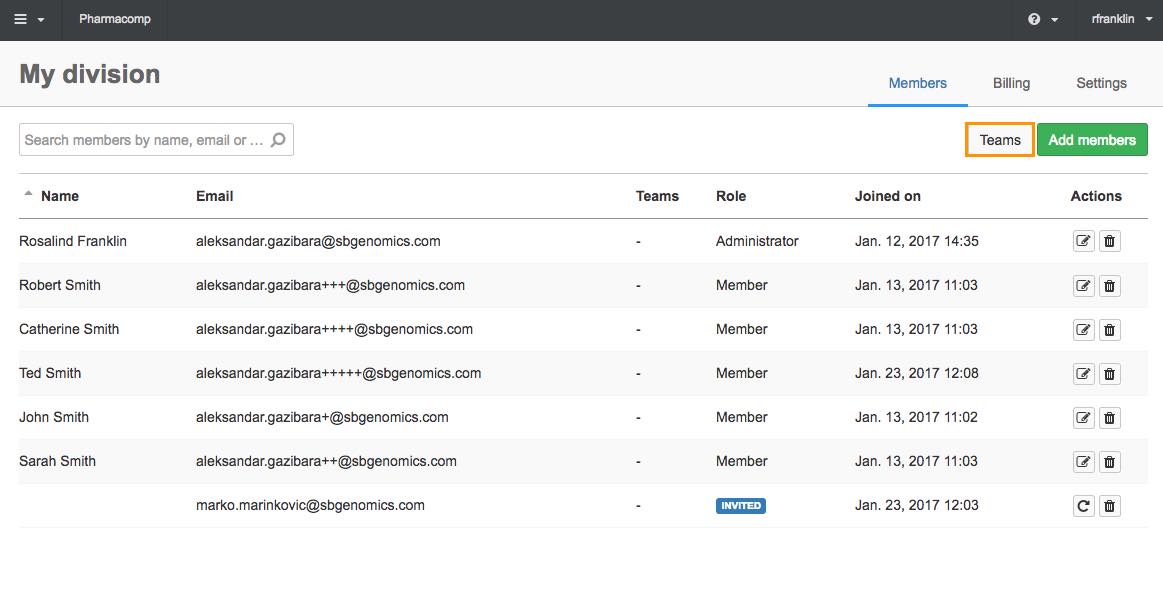
- Click Teams.
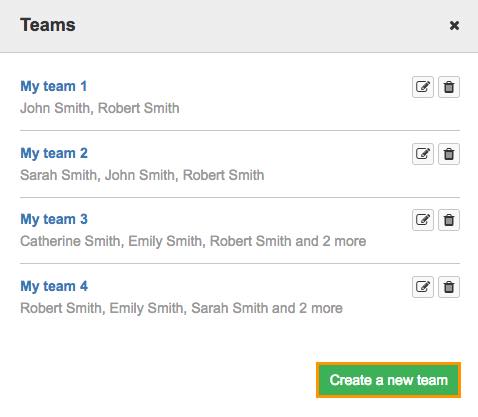
- Click Create a new team.
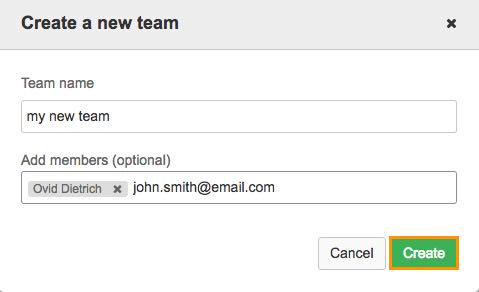
- Enter the name for your Team.
- Add Team members by entering their name or email address.
- Click Create.
The team is now created and you can add this Team to a project.
External collaborators cannot be added to a Team.
Remove a member from a Team
To remove a member from a Team, follow these steps:
- Click your username in the upper right corner.
- Click the name of your Division.
- Click Teams.
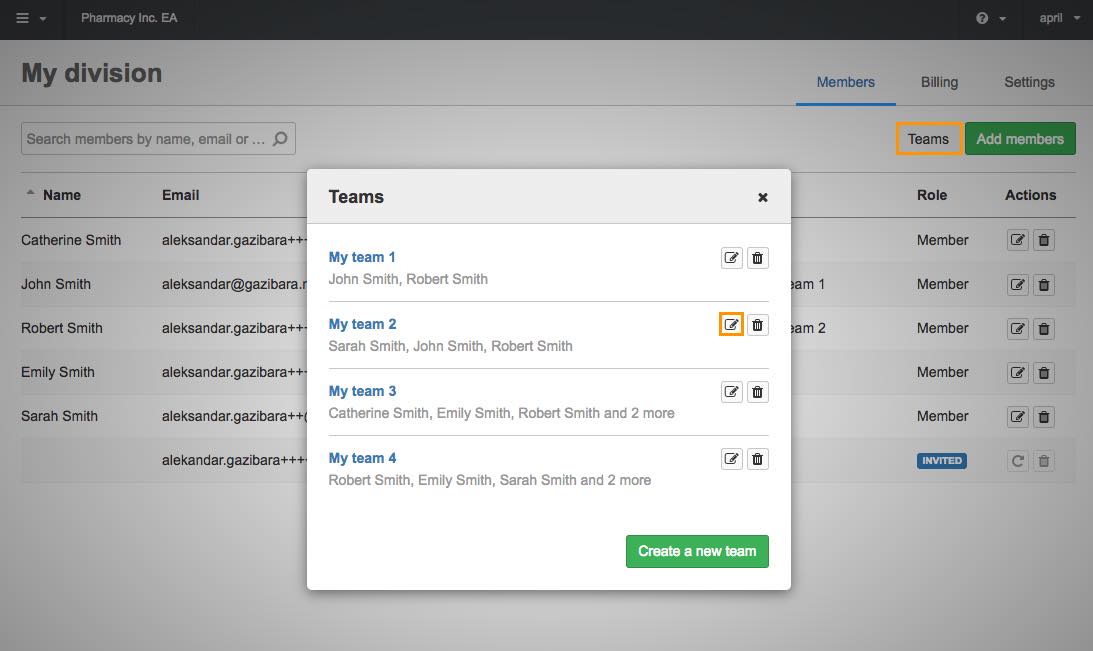
- Click the edit icon next to the Team you want to remove the member from.
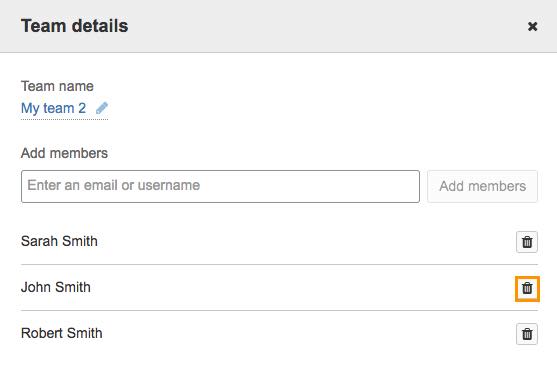
- Click the trash icon
 next to the Team member you want to remove from the Team.
 - Click OK and the Team member will be removed.
Rename a Team
To rename a Team, follow these steps:
- Click your username in the upper right corner.
- Click the name of your Division.
- Click Teams.
- Click the edit icon next to a Team.
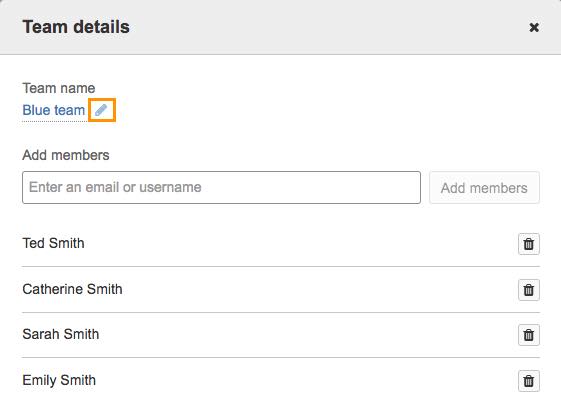
- Click the edit icon next to the team name and rename your Team.
- Click the check icon to save the change.
Delete a Team
To delete a Team, follow these steps:
- Click your username in the upper right corner.
- Click the name of your Division.
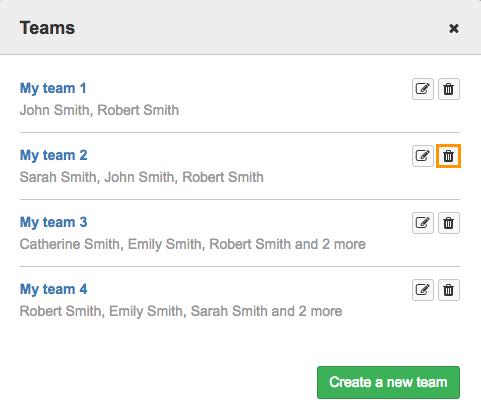
- Click the trash icon next to the Team you want to delete.
- Click OK to confirm and the Team will be deleted.
By deleting a Team, you remove the Team members’ access to the Team’s resources, but do not remove their accounts from the Division.
Updated 3 months ago
