Manage Division members
Add a Division member
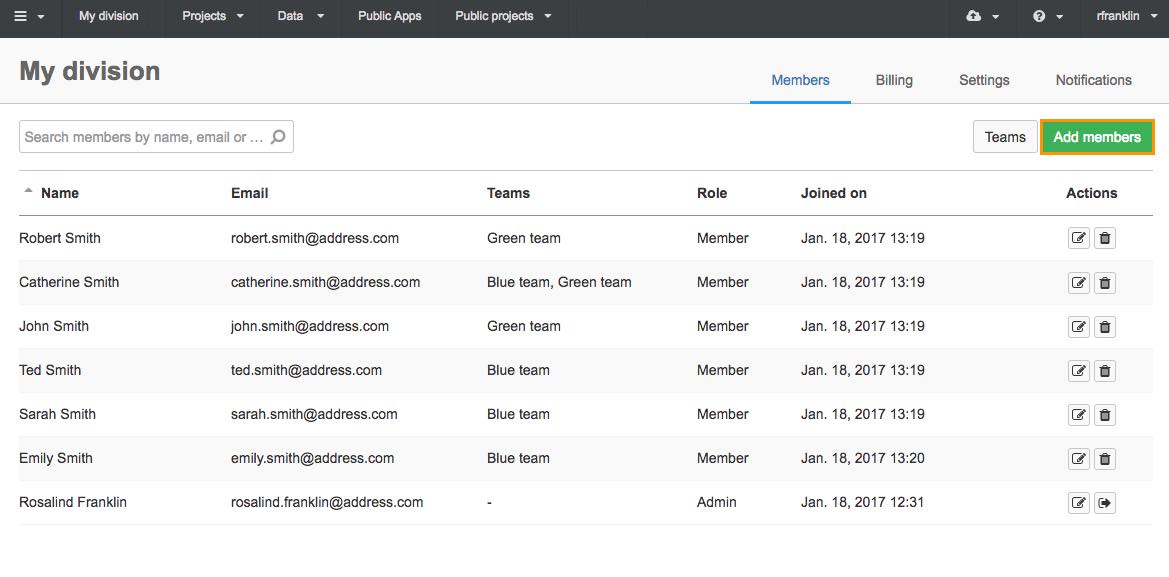
To add a member to your Division:
- Click your username in the upper right corner.
- Click the name of your Division.
- Click Add members.

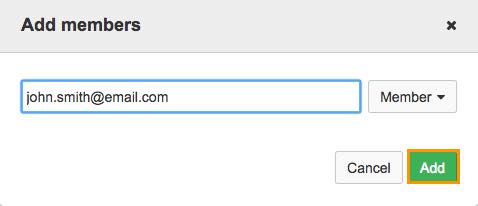
- Enter the email address of the member you want to add.

- Select a role for the member:
- Member, to add a Division member.
- Administrator, to set the user as the Division administrator (note: this option is only available to an Enterprise administrator).
- External collaborator, to add a user as an External collaborator who will have limited access to your Division.
- Click Add.
The member is added to the Division.
You can organize Division members into Teams which can be easily added to a project. Learn more about creating a Team.
Remove a member
To remove a member from your Division:
- Click your username in the upper right corner.
- Click the name of your Division.
- Click the trash icon
 next to a member you want to remove.
 - Click OK to confirm and the member will be removed from your Division.
Invite an External collaborator
The procedure for adding an External collaborator is exactly the same as for adding a Division member (see above).
These are the restrictions that apply to a user with an external collaborator role:
- can only access projects they were added to
- is given permissions for a project
- can only be a project member (not allowed to become a project administrator)
- cannot be added to a Team within a Division.
Updated 3 months ago
