Upload via the Seven Bridges Platform Uploader
Use the Seven Bridges Platform uploader for data that is stored on your local computer.
The Seven Bridges Uploader is a tool which can quickly and securely upload your private data from a personal computer or hard drive to the Seven Bridges Platform. The files can be added to any of your existing projects.
Install Seven Bridges Uploader
- Click Data in the top navigation bar and choose Data Tools.
- Click Download under "Desktop Uploader".
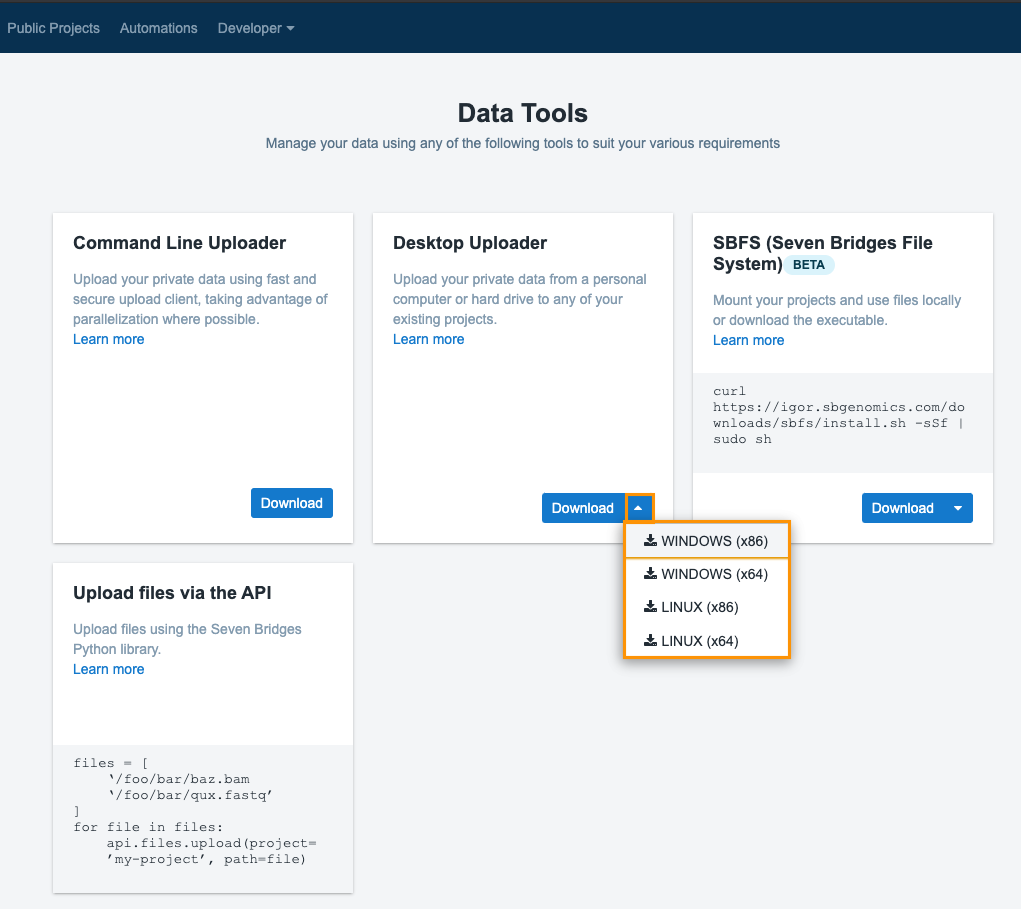
Your operating system will be automatically detected and the relevant version of the Desktop Uploader will be available for download. In case you need a version for a different operating system, click on the arrow next to the Download button and choose a different version.
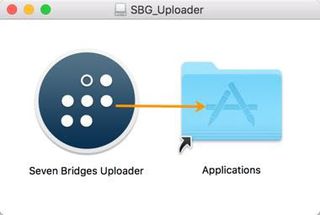
Once the installation package has been downloaded, click on it to install the Seven Bridges Uploader. Please note that the Uploader requires Java version 1.8.
Upload files
To upload files using the Seven Bridges Uploader:
- Start the Seven Bridges Uploader.
- Log in by entering your Seven Bridges Platform username and password or your authentication token and click Login.
If you are trying to upload to a project that is within a division, please enter your username in the following format:<division-name>/<username>. The exact<division-name>format can be seen in the Created by column in the list of all your projects and it is the part that comes before the/character. The<username>part is your Platform username.
- Click Upload.
- Navigate to the files or folders you want to upload.
* Allowed characters in file names are all alphanumerics and special characters except slash (/). File names can’t be longer than 255 characters.* Allowed characters in folder names area-z,A-Z,0-9, and special characters (_), (-), and (.). Folder names can’t be longer than 255 characters.
- Click Upload. A pop-up will appear, asking you to select the destination project for your files.
- Select the destination project from the Selected project drop-down menu.
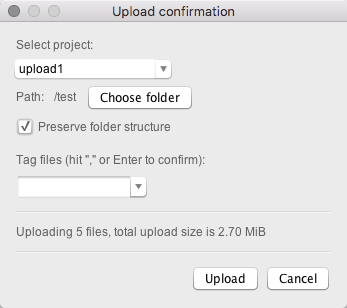
- To upload files to a folder within the project, click Choose folder and select the destination folder.
- Check Preserve folder structure to replicate the folder structure of uploaded files on the Platform. Otherwise, the structure of uploaded files is flattened.
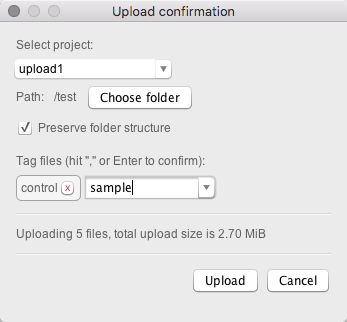
- (Optional) Add tags to your file by typing strings into the box below Add tags to the files. You can separate tags by pressing the return key or by inserting a comma, as shown below.
Autosuggested tagsAll tags which are already in the selected project will be autosuggested in the drop-down menu, as shown below. You can delete a tag by selecting the red x in the right-hand side of each tag.
- Click Upload.
As you upload, you can see the following information on the uploader, as shown below:

- Name: the name of the file as well as the tags in case you've added them to your file(s). If you're uploading more than one file, the number of files will display instead of the file name.
- Destination: the name of the project your file(s) will be uploaded to.
- Size: the total size of your upload.
- Progress: the percentage of files that are uploaded.
- Speed: current upload speed (mb/s).
- Status of your upload, which can be:
- Initializing
- in case of an ongoing upload, this will show the remaining time until the upload is complete
- Completed
- Paused
Upload timeMultiple-file uploads may take a while to initialize.
Tagging filesYou can also tag files as you upload them. Learn more about tagging your files..
Upload files using a manifest file
You can upload multiple files by using a manifest file. The manifest specifies the files that should be uploaded as well as the accompanying metadata. To upload files:
- Start the Seven Bridges Uploader.
- Log in by entering your Seven Bridges Platform username and password or your authentication token and click Login.
- Click Upload via Manifest.
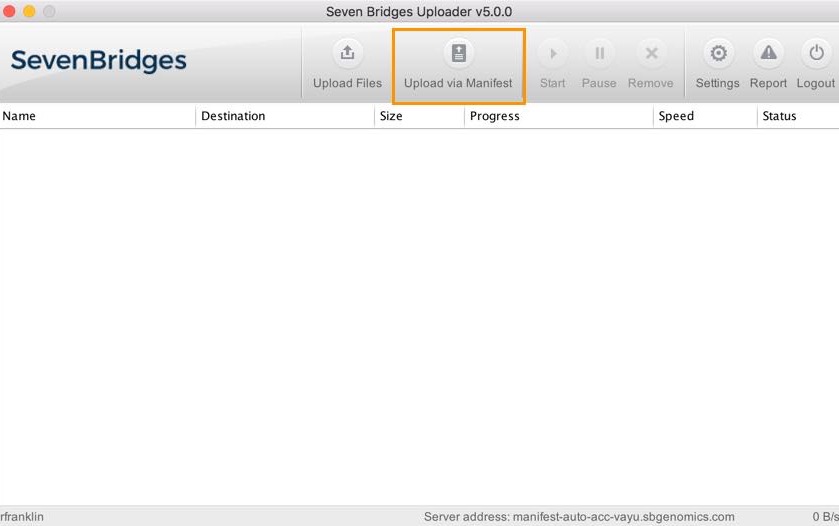
- Choose the manifest file on your computer (learn more about the Format of a manifest file).
- Click Parse Manifest.
The manifest file will be validated and the summary dialog will be displayed.
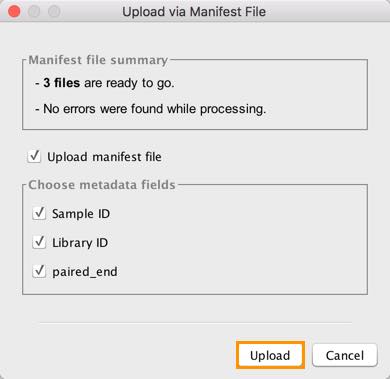
- (Optional) Unselect metadata fields you want to exclude.
- (Optional) Select Upload manifest file to also upload the manifest file to the Platform.
- Click Upload.
- Choose the target project.
- (Optional) Click Choose folder to choose the destination folder within the project.
- (Optional) Select whether you want the uploaded files to have a matching folder structure on the Platform.
- (Optional) Tag your files.
- Click Upload again to begin uploading the files.
The Seven Bridges Uploader will begin uploading the files. Once all files have been uploaded, you will see a Completed status on the right.
<<Previous: Upload your data to the Seven Bridges Platform
Updated 3 months ago
