3D Slicer
Integrating 3D Slicer as a Data Studio Analysis Feature Documentation
Purpose of this Document
The purpose of this document is to consolidate all the requirements, features, challenges, and future direction for integrating 3D Slicer as a Data Studio Analysis on the Seven Bridges platform. The intention is to reach a common and clear understanding of:
• Run 3D Slicer as a Data Studio environment
• Select the 3D slicer environment as one of the Data Studio analyses
• To annotate and interact with images using 3D slicer
• Able to see some example notebooks showing the functions of the 3D slicer
3D Slicer into Data Studio on Seven Bridges are to enable scalable, cloud-based medical image analysis, streamline imaging workflows with scripting and visualization tools, and support reproducible research. It aims to provide users with interactive and automated capabilities for processing and analyzing images.
Topics Addressed
Requirements and What We Know So Far
• Run full-featured 3D Slicer in the cloud with GUI access for advanced medical imaging visualization and analysis.
• Import imaging datasets directly from Seven Bridges project storage for immediate use in Slicer.
• Process data using CPU or GPU instances to handle large or complex imaging workloads efficiently.
• Export processed results and derived datasets back into Seven Bridges projects for sharing or further analysis.
• Maintain persistent workspaces so settings, data, and tools remain available across sessions.
Example Illustrative Expectations
What We Do Not Know
• Will users have persistent environments where they can resume work later?
• How is the user state saved and restored?
• How does the platform ensure that processing medical imaging data in 3D Slicer meets HIPAA/GDPR compliance?
• Are there firewall rules or restrictions on outbound network access that would block some features ?
• Is the Slicer container regularly scanned for vulnerabilities and sandboxed?
Current Platform Features by Operation
Run 3D Slicer as a Data studio Environment
• Users must create a new project or open any existing project.
• From the project workspace, click on Data Studio
• Users must create a new analysis and can see 3D Slicer (SlicerJupyter Beta) as a Data Studio environment
o Enter Analysis name
o Select Environment as 3d Slicer (SlicerJupyter Beta)
o Environment setup will be defaulted to 3d Slicer
o Select Instance type
o Attached storage (GB) will be defaulted to 1024, & Users can modify
o Users can select Suspend Time: On or Off, If
On then should the entire Suspend Time in minutes
o Click on Start and a new tab will open with 3D slicer analysis
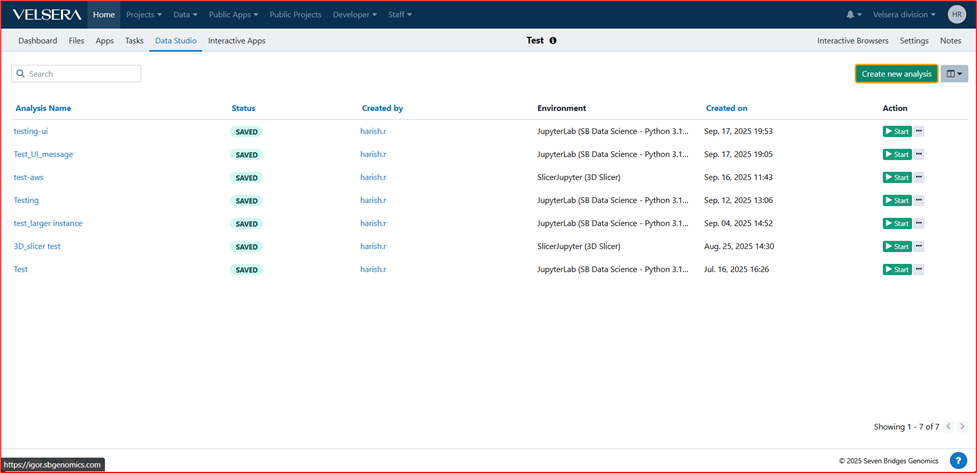
Select the 3D slicer environment as one of the Data Studio analyses
• Users must Create new analysis and select 3D Slicer(beta) as Data studio environment
o Enter Analysis name
o Select Environment as 3d Slicer (beta)
o Environment setup will be defaulted to 3d Slicer
o Select Instance type
o Attached storage (GB) will be defaulted to 1024, & Users can modify
o Users can select Suspend Time: On or Off, If
On then should the entire Suspend Time in minutes
o Click on Start

To annotate and interact with images using 3D Slicer
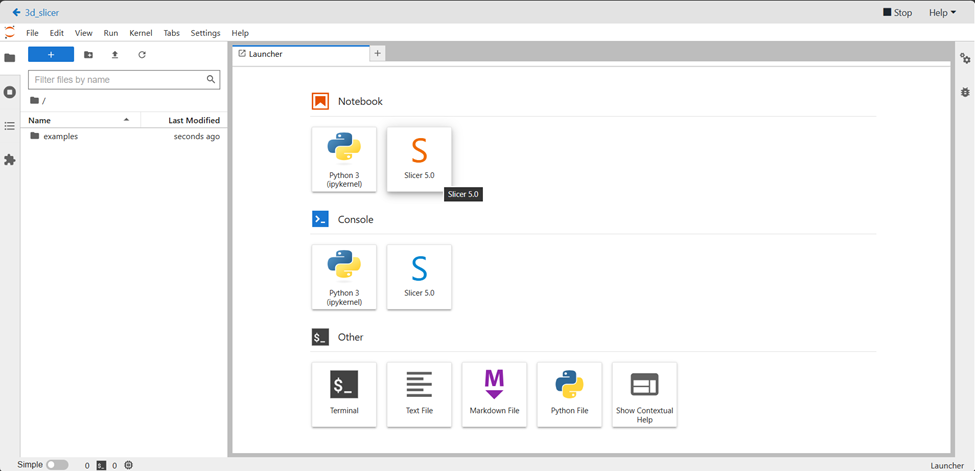
• A new tab will be opened where users can see the initializing environment
• After the initialization, the User can see an editor where they can edit the analysis code or image
• Import Imaging Data
From within 3D Slicer, open the Data Import dialog.
Select files from your project storage (e.g., DICOM) and load them into Slicer.
• Prepare the Data
Use the Data or Volumes module to confirm correct orientation, spacing, and visualization settings.
Adjust the window/level for better contrast if needed.
• Select Annotation Tools
Open the Segment Editor module for segmentation-based annotation.
Choose tools like Paint, Draw, Scissors, or Threshold for labeling structures.
• Annotate the Images
Interactively mark, outline, or label regions of interest (ROIs) in the image slices.
Use 2D slice views and 3D rendering to refine annotations.
• Save and Review Annotations
Save segmentation results as label maps or model files within the Slicer session.
Review the annotations using 3D visualization before exporting.
• Export Results to Seven Bridges
Export the annotated images or segmentation files back into your Seven Bridges project storage.
Optionally, use them as inputs for downstream workflows or share with collaborators
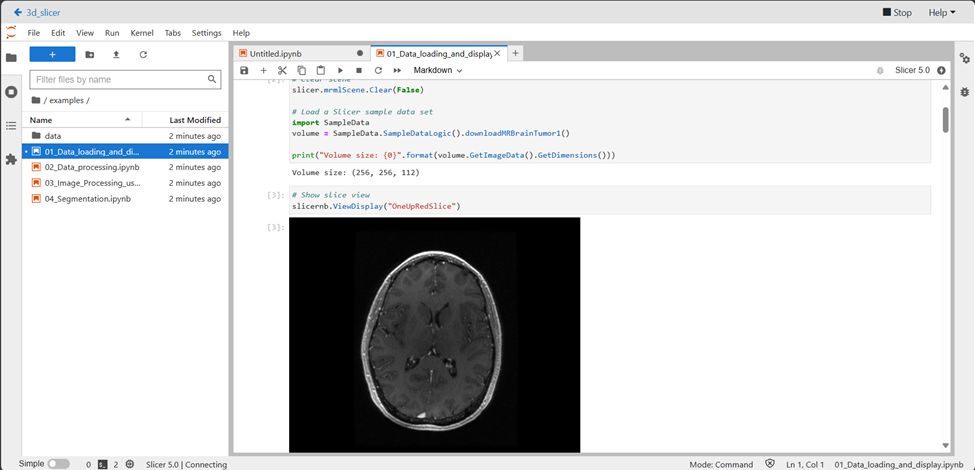
Able to see example notebooks
o Demonstration of Basic Image Loading – Shows how to open DICOM files from Seven Bridges project storage into 3D Slicer.
o Segmentation & Annotation Examples – Walks users through creating segmentations, labeling structures, and exporting results.
o 3D Visualization Tutorials – Demonstrates rendering, adjusting volume properties, and generating 3D surface models.
o Extension Usage Samples – Shows how to install and use popular Slicer extensions for specialized tasks (e.g., Radiomics, SlicerRT).
o Data Import/Export Workflows – Examples of pulling datasets from Seven Bridges storage and pushing results back after processing.
o Automation via Python Scripting – Notebook snippets for automating tasks in 3D Slicer using its Python API within the Seven Bridges environment.
o GPU-Accelerated Processing Demos – Illustrates how to run GPU-intensive imaging workflows for speed optimization.
o Integration with Downstream Analysis – Examples showing how processed outputs from Slicer feed into CWL pipelines or machine learning workflows in Data Studio.
Generalizations, Approaches, and Models
The above-proposed solutions are based on current requirements and the current level of understanding of what 3D Slicer needs.
• Keep an eye on Data Studio known issues
References
Updated 6 days ago